Instagram

Showing posts with label coat of arms. Show all posts

Wednesday, May 14, 2014

Clay Castles and Coat of Arms by 4th Grade

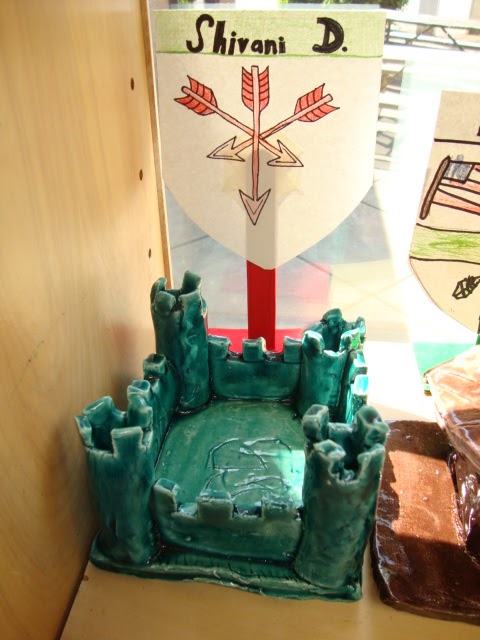
This student had just moved from Japan.
What an amazing example of a Japanese castle!!!

 I love clay. I like how it feels. I like how it smells. I like how many things can be done with it. The custodian does NOT like how, even after a thorough cleaning, it still gets tracked out of my room and down the hall. 99.9% of kids tend to agree with my assessment of clay. It's just plain fun.

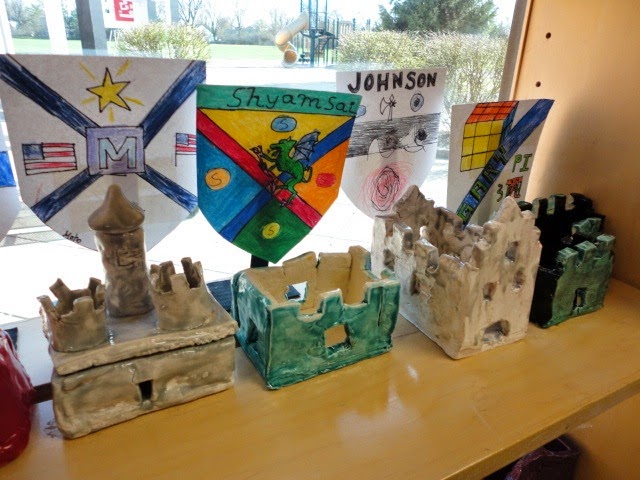
Castles are an ever popular project at Thomas. It's a lesson I wrote while I was student teaching many moons ago and is the only lesson from that time that I've held onto. By 4th grade, students at Thomas have had experience with basic forms, attaching with scoring, wedging, and basic sculpture. This combines some of those skills and adds the concept of slab construction. 

I really like to use square dowels from the hardware store in order to get the thickness for the slab. There are other products out there, but the dowels have always worked perfectly for my students. 

The variety of artwork is pretty awesome with this project. No two castles are ever the same. Some students get more advanced and wind up with time to make a removable roof (lid) for their castles. The coat of arms winds up being a fancy way of making a name label. It adds some class to the whole project. 

Click here to download my lesson plan!

Monday, May 20, 2013

Clay Castles with Coat of Arms by 4th Grade

Every art teacher has projects that are yearly favorites. Students would go absolutely nuts if they didn't get to do "that project." This is one of those projects for me; kids start talking about wanting to make castles in 1st grade. I actually wrote this lesson way back when I was student teaching and have continued using it for 4th grade every year since. 

Castles are a topic that kids always seem to be interested in. I show my students examples from all over the world as inspiration, then let them loose with sketch paper. I have them each draw at least a front and top view of their castle. I found that the top view really helps them understand how they will actually make it out of clay. 

After that, it's just basic slab building. This project takes about 4 days of working with wet clay. I know some people have problems with projects drying out, so I'll share my method of keeping ceramic work wet. 

Mr. Stoller's Tried and True Method for Keeping Clay Moist
  • I use old cafeteria trays for storage. Most classes use 3-4 trays.
  • Place the work on the trays at the end of class. I do this because I was good at Tetris and can fit more castles per tray than my kids can.
  • Cover the entire tray with damp paper towels. I assign this job to a couple of responsible students per class.
  • Place the entire tray into a large trash bag. Push out as much air as possible and fold the open end under the tray.
  • I write the teacher's name on a piece of masking tape and put the tape on the bag so I don't mix up the work.
  • I just open up the bags the next time that group has art, and the clay is still perfectly moist. Use new paper towels when putting the clay away at the end of class.
  • If a class misses or there is an extended break, I will open up the bags and squirt a little water into them.
Hopefully those tips are helpful. I have my students create a coat of arms in between when they finish their castle and when they glaze it. I always give clay projects a couple of weeks to dry out before the bisque fire. It is longer than they really need, but I've never had a clay project explode!


Thursday, April 26, 2012

4th Grade Clay Castles & Coat of Arms

Wow. Beautiful design! 
I love clay. If I could do clay projects all year I would seriously think about it. I tend to schedule my clay projects toward the end of the year because it is convenient to have everything at school for the art show. This project is one that I tried out during student teaching many years ago and have continued because my students enjoy it so much. 


We study castles from all over the world and each student designs their own castle. Using a slab building technique, they spend about five classes building their castles, adding details, and glazing. Last year, I decided to have each student make a small coat of arms while we were waiting for the castles to dry and be bisque fired. In addition to looking really cool, the coat of arms also serve as a name tag for the castles at the art show. All of the lower grades constantly ask about when they get to make clay castles. First graders are really bummed out that they have to wait for so long! 


Here is the lesson plan!