Instagram

Showing posts with label 3rd Grade. Show all posts

Tuesday, June 14, 2016

3rd Grade Terra Cotta Warriors

I was lucky enough to post a student teacher again this year. It was my fourth time in the last five years and it went extremely well. Based simply when student teachers are placed in my building, I often will have them work with students on a couple of projects that will wind up in the art show. 

Miss Christie Paul, who was from The Ohio State University, worked with my students for a total of seven weeks. She had written this clay lesson previous to working with my students and I told her it was too cool not to use. 

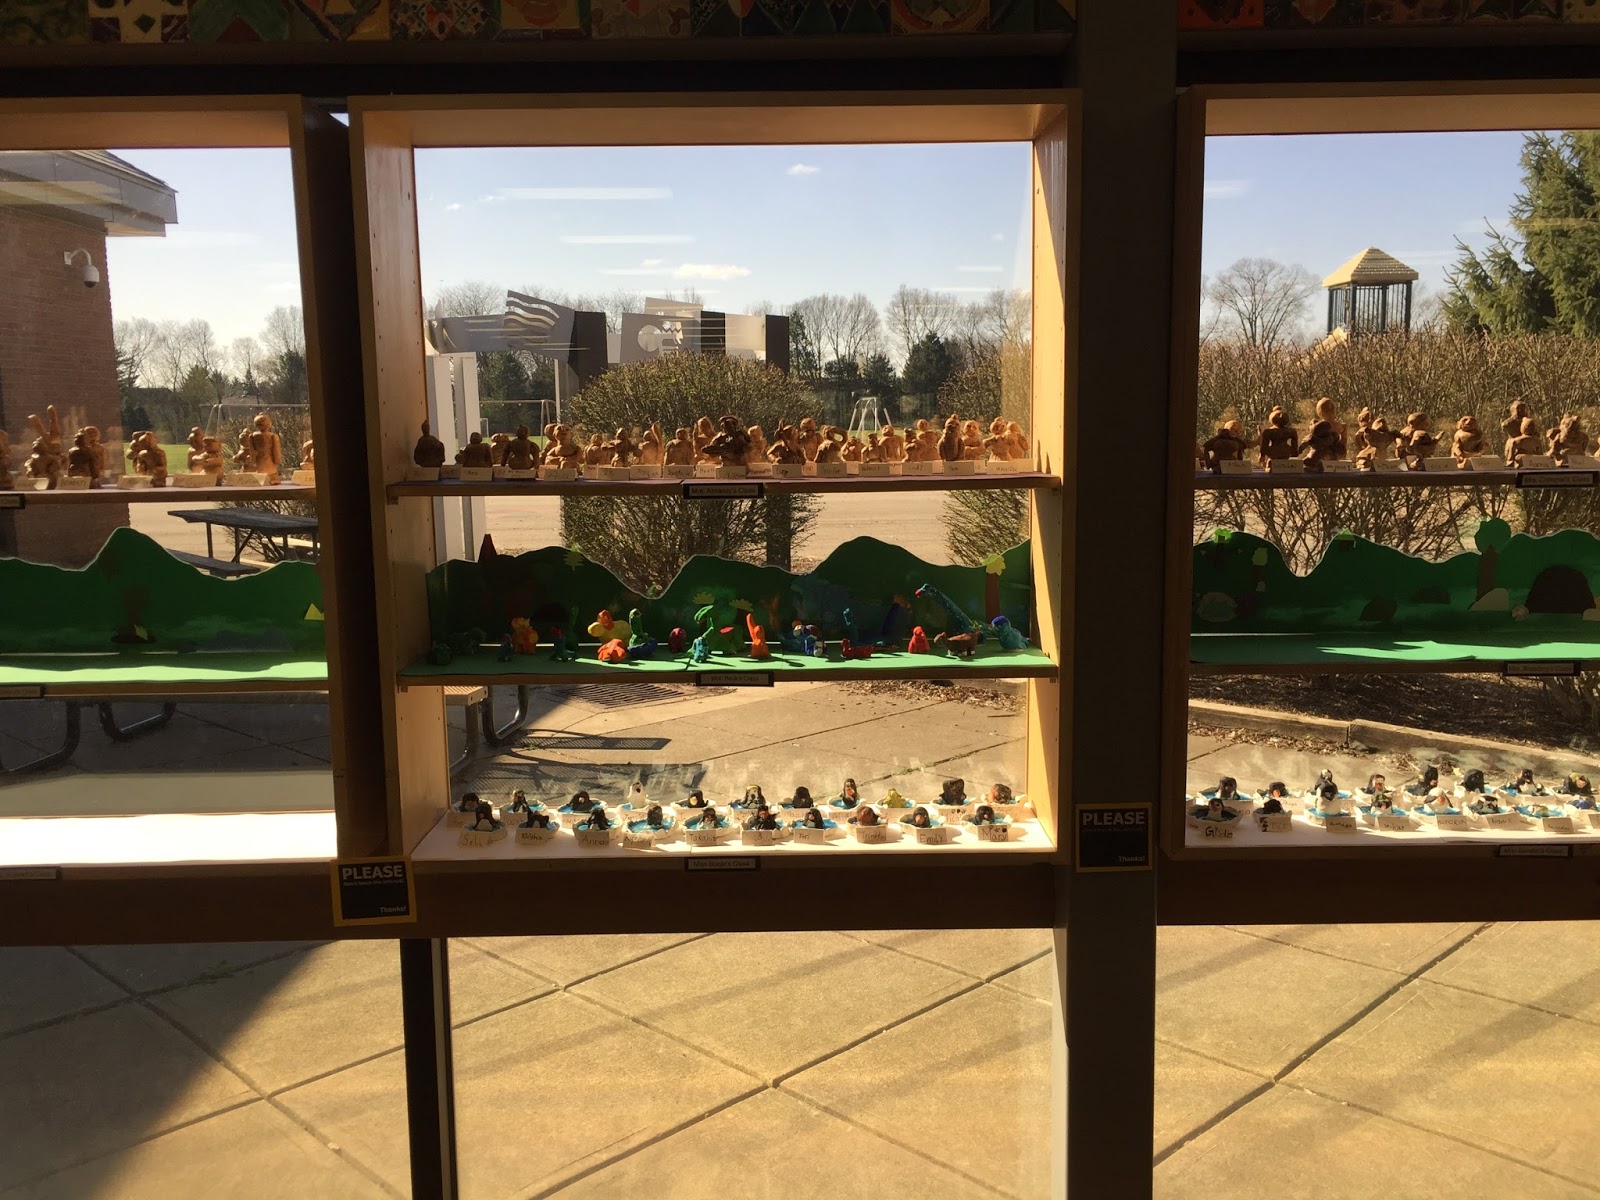
Miss Paul led discussions about the Terra Cotta warriors found in China. Students learned that each one is different and the sculptures represented many different types of people, not just warriors. Each student first drew his or her own warrior before building it out of clay. The clay went together piece by piece over the course of about three classes and was put together using scoring and a few drops of water. Some details were carved in after the sculpture was finished. 

The warriors were bisque fired, then they needed some paint. We used a two step process that works very well for aging sculptures. Students first painted the entire piece with a mix of acrylic paints that gave it the basic warm light brown color. After that layer was dry, students went over the whole sculpture again with a wash of darker brown paint. This was almost immediately wiped off. The cool part of this technique is that the wash will fill into details and cracks which really brings out the smaller, more intricate elements of the sculpture. 

Overall, this lesson turned out very well. I'm very seriously considering using it again next year! 


Wednesday, January 6, 2016

3rd Grade Charley Harper Inspired Cardinals

Stop! Harper time! 

Wow. That was super lame. It did make me chuckle, though. It's also true. Right before winter break is when I typically have my 3rd graders study the work of Charley Harper. The outcome is a lesson that forces students to think and create art in a new way. It also looks pretty wintery and makes for a great display.

This lesson is all about Charley Harper, an artist who lived in Ohio the majority of his life. If you're familiar with his work, you know that he uses flat, graphic shapes to create mainly images of wildlife. As my school is in Ohio, I have students all make cardinals. I don't like limiting a project that much, but it works out in this case for a couple of reasons. First, there are limitless ways to create a cardinal out of flat, graphic shapes. No two students create identical cardinals. It also gives me the opportunity to display quite a few reference pictures, so students can get a really good grasp on what they are creating. 

I have students start with about 30 minutes of small sketches. I usually have students draw quite a bit before they begin a final project and it results in more thoughtful work. Students then select their favorite sketch and use construction paper to recreate it. They then create a background. More choice is included in making the background. I demonstrate how to make trees (using a dry brush technique), how to make snowflakes (using white paint and the handle of a brush), snow drifts, berries, and bird footprints. Students chose to use any or all of those ideas to make their own background. As has been the case before, the results of this lesson are super successful. 

Download the lesson plan for this project here!


Tuesday, November 24, 2015

Ancient Maps by 3rd Grade

I wrote this lesson a couple years ago and I really like it. I know some people who go full choice in their art rooms. Part of me really likes the idea of a choice-based art room, but a larger part thinks that kids really benefit from some guidelines in a project. Just personal preference. I've been working on ways of incorporating more choice within the framework of my projects. I think this lesson gives students a lot of freedom to display their creativity.

Essentially, we look at all kinds of older maps and talk about how they are different than current maps. Hint- they are WAY cooler. They are as much art as they are cartography. Oh, that's another cool part of this project. I get to say "cartography" and "cartographer" all the time. It makes me happy. 

Students then get to design their own map of a fictional place. I let students have pretty much complete freedom in the theme of their maps. Some choose to create maps of video game worlds, some map out locations from a favorite book or tv show, and others just completely freestyle. I ask that they include both water and land, a title, a compass rose, and a map key. Additionally, I ask them to include at least six landforms. Parts of maps are part of the 3rd grade social studies curriculum in Ohio and landforms are in the curriculum for 4th grade. 

I really like the results I get out of the project. It's fun to sit and study the small details that students put into their work. I have learned a couple of things over the years to make the project run a little smoother. Liquid watercolor works very well for painting the water. It's easy to prep and I'm not constantly replacing the blue in my watercolor trays. It's also a lot more consistent in terms of color. I also have students add color to map details with colored pencils. It's just a lot neater than the results I got the first year with watercolor. 

Click here to download my lesson plan!


Click here to download the handout I put together to help students with this project!
Beautiful details from the map above!


Detail of "burned" map edges. Wet on wet watercolor tricks!


Were you wondering what a fairy unicorn princess looks like? Wonder no more!

Great example of a map with mostly land. 

Monday, July 20, 2015

3rd Grade 3D Paper Landscapes

I love it when a plan comes together. Sometimes it doesn't. That's fine, too. 

This lesson originated as an amalgamation of two projects I've taught to 3rd grade in the past. One of my goals was to create more 3D lessons this year. This was my attempt for 3rd grade. 

Essentially what I wanted to do was have a paper landscape with individual pieces created for the foreground, middle ground, and background. The landscape would depict the habitat of an animal that would also be included in the work. The landscape elements would be combined with two accordion-like edges, and a little paper frame would finish the front. It would look something like this quick demo piece I did. 

The project went great. Then I demonstrated how to put the whole thing together. That's when I got the dreaded look of confusion from most of the class. I knew the way I had it planned was going to be kind of difficult, so I had my demonstration broken down pretty well. I was using a document camera and my projector to project my demo on the big screen so everyone could see. We worked step by step. A few kids got it, but it was mass confusion for the rest. Needless to say, I changed things the next day. 

I ended up making little springs out of 1x3 strips of card stock and having students attach attach several in between layers of their landscape. I still really like how the project turned out and it was MUCH simpler to teach to my other four classes.


Monday, July 13, 2015

3rd Grade Collagraph Quote Prints

This is another one of my absolute favorite projects. I'm finding that I really enjoy lessons that are different from the usual painting/drawing norm. I work really hard to make sure I have a ceramic lesson as well as a printmaking lesson for each grade level every single year. 

This lesson was one of the last printmaking lessons I added into my curriculum. I was inspired by a middle school project over at The Calvert Canvas Blog and I adapted that idea to my 3rd grade students with a few minor changes. 


The boards are ready to go!
Each student chooses a favorite quote- either from a list I have or they may use one they already know. They then do several sketches and a peer review while they work out different ways of designing their text. After the final design is decided, students draw their quote on a piece of thin foam. They cut out their letters, then glue them backwards (with the help of a mirror) to a piece of chip board. They then use ink and brayers in order to print on a piece of construction paper. I always have my students make several prints in order to make sure they get at least one really nice finished print. 

Click here to download my lesson plan!